After a Central Virginia winter, most homeowners assume their crawl space made it through just fine. The problem is that a post-winter crawl space inspection may reveal issues that don’t show up right away.
Lynchburg homes typically go through 40 to 60 freeze-thaw cycles each winter. That repeated expansion and contraction quietly stresses foundation walls, shifts materials, and introduces moisture into areas you don’t see until spring. By the time warmer, humid air arrives, that hidden damage starts to surface: damp insulation, musty odors, or visible mold.
The U.S. Environmental Protection Agency identifies crawl spaces as one of the most common areas for hidden moisture and mold issues, while the U.S. Department of Energy notes that uncontrolled moisture can increase energy costs, weaken the structure, and degrade indoor air quality.
This guide walks Lynchburg homeowners through a practical post-winter crawl space inspection: the five problems to look for, what each symptom means, and when a DIY fix is enough versus when it’s time to call a professional.
A proper post-winter crawl space inspection should check for five things:
- Foundation cracks from freeze-thaw cycles
- Standing water or damp soil
- A damaged or displaced vapor barrier
- Wet or sagging insulation
- Musty odors or visible mold
Central Virginia’s Climate Zone 4A mixed-humid weather makes all five common, and catching them early, before summer humidity drives mold growth, is the single most cost-effective home maintenance step a homeowner can take in spring.
Not sure what you’re looking at in your crawl space? A professional crawl space evaluation can tell you whether spring damage is cosmetic or the start of something bigger.
Why a Post-Winter Crawl Space Inspection Matters in Central Virginia
How Virginia Winters Actually Cause Damage
Lynchburg doesn’t experience long, deep freezes. Instead, it sees frequent temperature swings above and below freezing, which are exactly the conditions that lead to crawl space freeze thaw damage.
The University of Illinois Concrete Microscopy Library documents how water in concrete pores expands when frozen, creating internal stress that leads to cracking over repeated cycles. Once those cracks exist, water has an easy path in. Each rain event pushes moisture deeper, and each freeze widens the damage further.
What this means at ground level is that foundation walls and concrete block piers absorb groundwater through fall and early winter, then crack — sometimes microscopically, sometimes visibly — as that water freezes and thaws repeatedly. The damage multiplies underground. Once a crack exists, the next rain pushes water deeper, the next freeze widens the crack, and a pathway for moisture intrusion is born.
This is how small, invisible issues turn into larger signs of crawl space damage by spring.

Why You Shouldn’t Wait Until Summer
Spring is the ideal time for a spring crawl space inspection Virginia homeowners can rely on. Winter damage is visible but mold hasn’t yet taken hold and summer humidity hasn’t yet driven condensation into every square foot of the crawl space.
The EPA warns that crawl spaces with high relative humidity and bare-earth floors are common sites of hidden mold growth, and that wet materials must be dried within 24 to 48 hours to prevent mold colonies from forming. Waiting until summer allows humidity to rise, turning minor issues into widespread crawl space mold in Virginia. Something as fixable as a vapor barrier tear or a damp insulation batt becomes a full mold remediation job.
The 5-Point Post-Winter Crawl Space Inspection Checklist
1. Foundation Walls and Piers — Look for New Cracks
Start with a flashlight and carefully scan foundation walls and support piers. Photograph any cracks you find so you can track them year over year.
Look for:
- Hairline vertical cracks (usually cosmetic)
- Stair-step cracks in block walls
- Horizontal cracks or widening gaps
Cracks wider than a nickel or horizontal cracks should be evaluated by a professional. These are common indicators of structural stress from freeze-thaw cycles. Pay special attention to the outside corners and to any point where a downspout discharges near the foundation, as these are the freeze-thaw hot spots.
2. Ground and Vapor Barrier — Look for Water
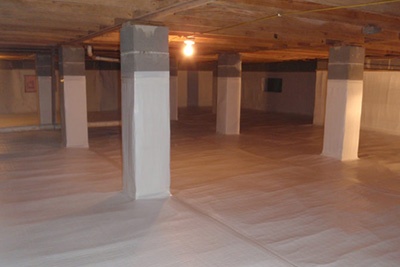
A proper vapor barrier inspection is critical. The DOE recommends a 6-mil polyethylene vapor diffusion barrier across the crawl space floor to prevent soil moisture from migrating into the crawl space and to limit crawl space moisture Virginia homes often experience.
Check for:
- Standing water or damp soil
- Condensation on surfaces
- Tears or gaps in the vapor barrier
- Loose seams or areas pulling away from walls
Any of these points to moisture intrusion or drainage problems contributing to foundation moisture spring conditions.
3. Insulation — Look for Sagging, Dark Spots, and Gaps
Insulation is one of the first materials affected by moisture, and under-floor fiberglass batts are the first casualty of a wet crawl space.
Look for:
- Sagging or fallen batts from joist cavities
- Darkened or stained insulation
- Damp or heavy sections
- Missing insulation near pipes or ducts
Insulation damaged from moisture reduces effectiveness significantly. Wet insulation loses its R-value and traps moisture against the subfloor, affecting both comfort and energy performance, causing cold floors in winter and higher cooling bills in summer.
4. Wood Framing — Look for Discoloration and Soft Spots
Inspect floor joists, sill plates, and rim joists.
Watch for:
- Dark staining
- White, chalky residue (efflorescence)
- Soft or weakened wood when pressed into

Soft wood is a serious issue and may indicate rot. If found, it should be addressed immediately by a professional.
5. The Air Itself — Trust Your Nose
A musty smell is often the earliest warning sign of crawl space humidity problems. The EPA notes that any area that smells moldy or musty should be investigated, as the odor suggests that water is or was present.
If the smell reaches the living space above, the crawl space air is already moving up through the floor, which means the humidity and any contaminants are going with it.
What to Do With What You Find
DIY Fixes Worth Doing
Some issues can be handled without professional help:
- Reseal minor vapor barrier seams with appropriate tape
- Clear debris and improve exterior drainage by extending downspouts 4–6 feet away from the foundation
- Adjust grading to direct water away from the home
- Replace small sections of damaged insulation after fixing the moisture source
When to Call a Professional
Certain issues go beyond a DIY fix:
- Standing water
- Visible mold larger than a 3-foot-by-3-foot patch
- Horizontal foundation cracks
- Soft or rotting wood
- Widespread insulation damage
The EPA specifies that mold covering more than roughly 10 square feet should be addressed by someone with remediation experience. Dealing with widespread wet insulation is a professional job, as replacing batts without addressing the moisture source guarantees the problem returns next spring. These conditions require professional evaluation to prevent long-term structural or air quality issues.
Consider a Long-Term Solution
If you’re dealing with recurring moisture or repeated seasonal damage, it may be time to look beyond repairs.
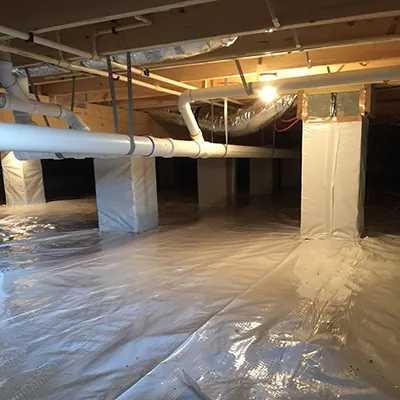
Encapsulation—sealing the crawl space, insulating the walls, and installing a continuous vapor barrier—can provide a long-term solution. The DOE reports that building an unvented, conditioned crawl space with perimeter wall insulation and a sealed vapor barrier can reduce heating and cooling energy use by up to 20 percent compared with a vented crawl space.
For a homeowner who keeps finding the same vapor barrier tears and wet insulation every spring, encapsulation is often cheaper over five years than repeat repairs.
Frequently Asked Questions
Late March through early May, once overnight temperatures stay consistently above freezing but before summer humidity sets in. This window gives you the best visibility of winter damage before mold growth accelerates.
New foundation cracks, shifted or cracked support piers, displaced vapor barriers, and damp or sagging insulation are the most common early signs after a Central Virginia winter
No. The EPA recommends maintaining indoor relative humidity between 30 and 50 percent and drying any wet areas within 24 to 48 hours to prevent mold. Ongoing dampness in a crawl space should always be investigated
Yes. Fiberglass insulation loses most of its R-value once saturated, and wet batts hold moisture against the subfloor. Replace damaged sections only after the moisture source has been identified and corrected
Sealing, insulating the perimeter walls, and installing a full ground vapor barrier (encapsulation) is the better long-term approach in Virginia’s mixed-humid climate. It reduces moisture problems, warms floors, and lowers energy bills. A professional evaluation will determine which approach fits your specific home.
A post-winter crawl space inspection is one of the most effective spring maintenance steps Lynchburg homeowners can take.
Checking the foundation, vapor barrier, insulation, framing, and air can help you catch small issues before they become expensive problems.
If what you find requires more than a minor repair, getting a professional evaluation early can prevent mold growth, structural damage, and rising energy costs. For help with your crawl space or to schedule a professional evaluation, contact Toler Insulation at 434-207-6941.
References:
Clark, Cheryl, and Ricardo Aguilar. Freeze-Thaw. Concrete Microscopy Library, University of Illinois at Urbana-Champaign, publish.illinois.edu/concretemicroscopylibrary/freeze-thaw/.
U.S. Department of Energy. “Moisture Control.” Energy Saver, www.energy.gov/energysaver/moisture-control.
Building America Solution Center. (n.d.). Unvented, insulated crawlspaces. Pacific Northwest National Laboratory, U.S. Department of Energy. https://basc.pnnl.gov/resource-guides/unvented-insulated-crawlspaces
U.S. Department of Energy. “Where to Insulate in a Home.” Energy Saver, www.energy.gov/energysaver/where-insulate-home.
U.S. Environmental Protection Agency. “A Brief Guide to Mold, Moisture, and Your Home.” EPA, www.epa.gov/mold/brief-guide-mold-moisture-and-your-home.
U.S. Environmental Protection Agency. “Mold Course Chapter 2: Why and Where Mold Grows.” EPA, www.epa.gov/mold/mold-course-chapter-2.
U.S. Environmental Protection Agency. “Mold Course Chapter 3: Mold Investigation.” EPA, www.epa.gov/mold/mold-course-chapter-3.
U.S. Environmental Protection Agency. “Mold Course Chapter 9: Mold Prevention.” EPA, www.epa.gov/mold/mold-course-chapter-9.
U.S. Environmental Protection Agency. “What Are the Main Ways to Control Moisture in Your Home?” EPA, www.epa.gov/mold/what-are-main-ways-control-moisture-your-home.
Virginia Department of Housing and Community Development. “2021 Virginia Residential Code Significant Changes Frequently Asked Questions.” Commonwealth of Virginia, www.dhcd.virginia.gov/sites/default/files/DocX/technical-memos-bulletins/2021-vrc-faq.pdf.